
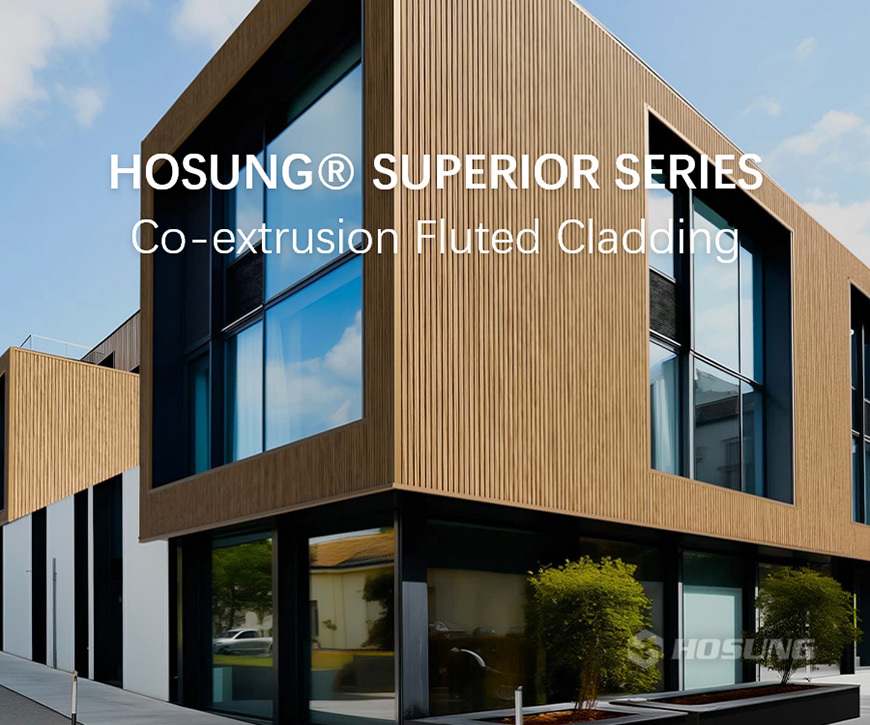
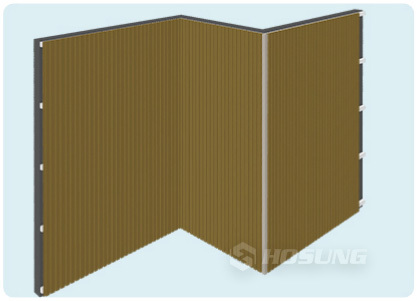
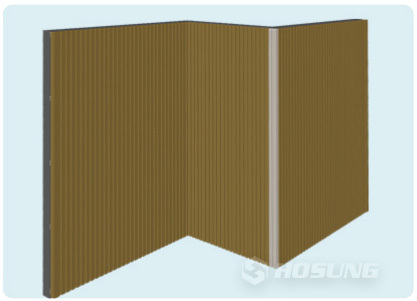
Hosung®-HS176S13 Beige


Hosung®-HS176S13 Beige
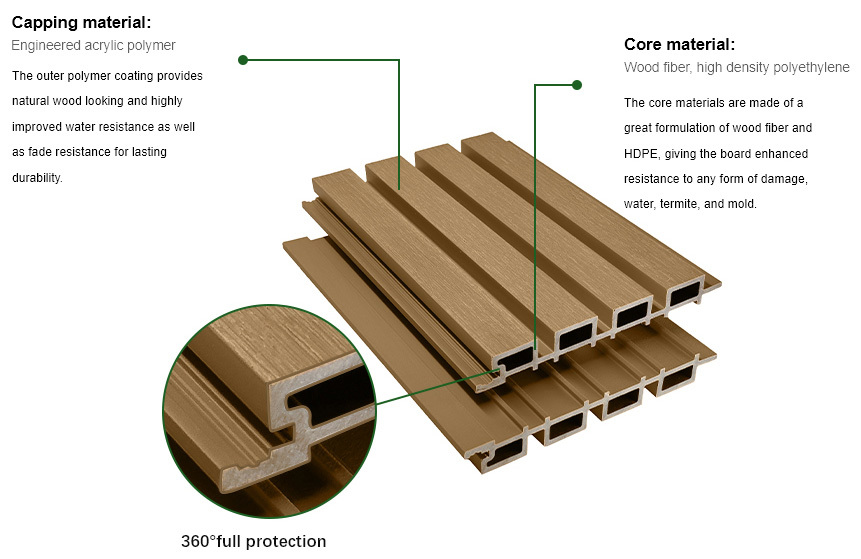
The outer polymer coating provides natural wood looking, and highly improved water resistance as well as fade resistance for lasting durability.
keywords:
Category:


|
Rot-resistant |
Termite-resistant |
Long-lasting color |
High Performance |
|
Maintenance-free |
Deform-resistant |
Easy to install |
Eco-Friendly |


COLOR & TEXTURES


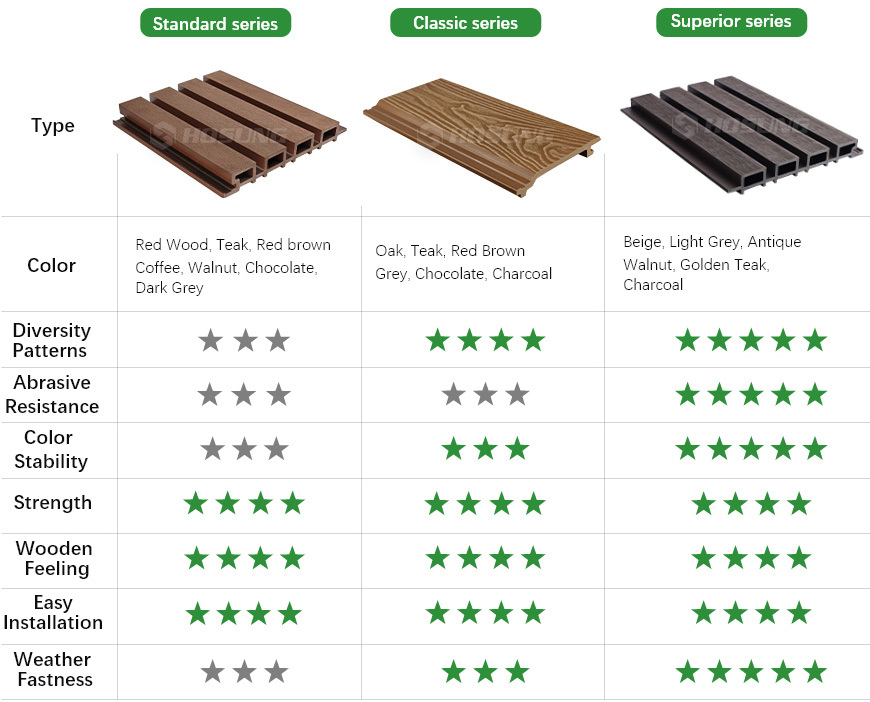
3 SERIES OF CLADDING COMPARISON

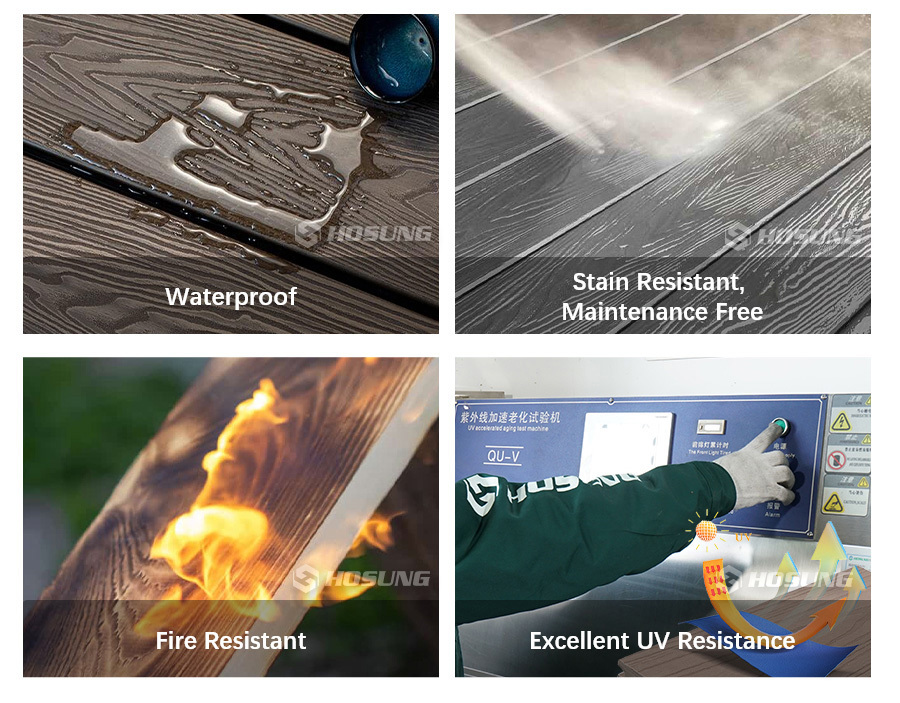
PRODUCT TESTING
CLADDING ACCESSORIES&INSTALLATION
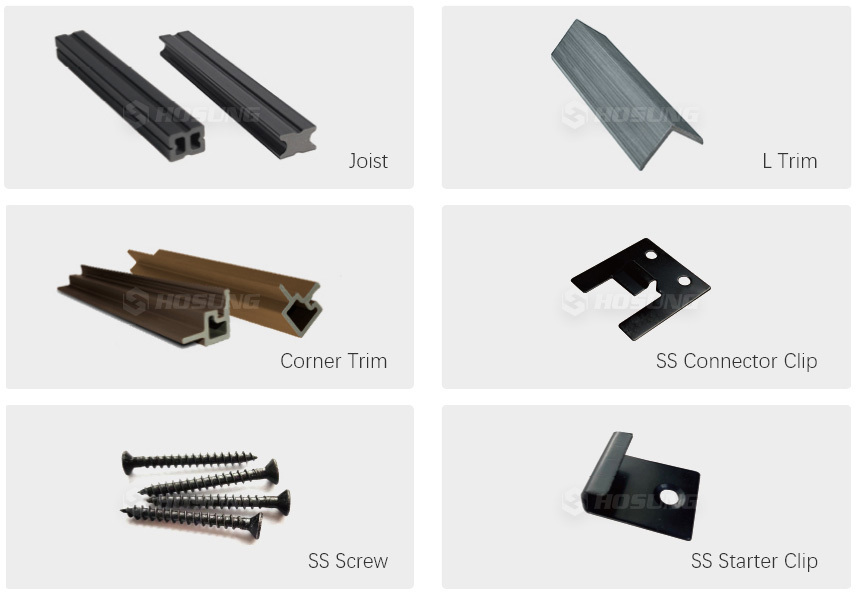

|
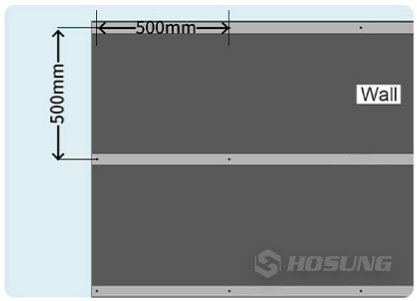
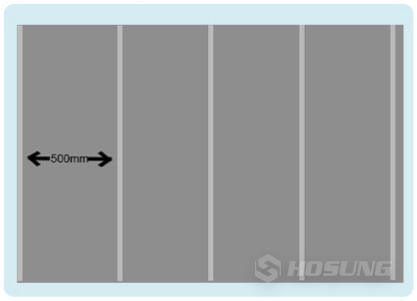
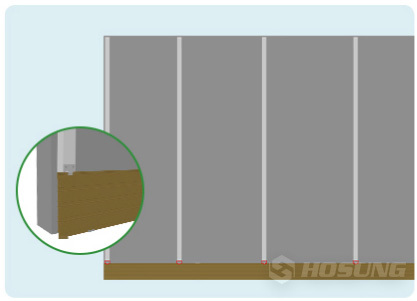
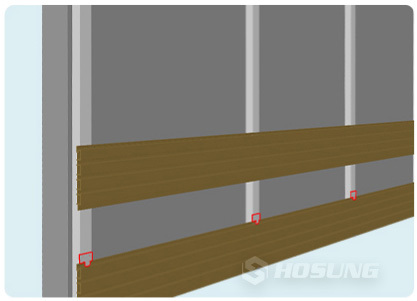
Install oists onto the wall with a 500mm span between adlacent jolsts. Secure the joists to the wall with screws at 500mm spans. Install 2 starter clips onto the bottommost joist. |
Insert 1st cladding panel nto the bottom 2 starter clips. Then insert connector clips in line with the right side of cladding at each cladding and joist junction place, and secure the cladding with connector clip by screw. |
 |
 |
|
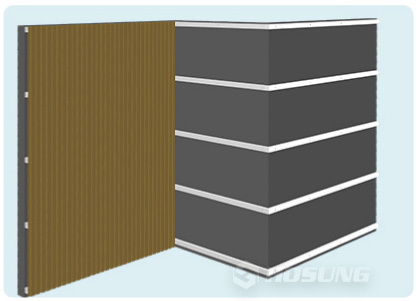
Insert other panels until the remaining wall width is too narrow for a full panel. Measure the distance from the last panel to the corner and Cut a cladding panel. Put the trimmed cladding panel in place. |
Insert one side of the cladding panel into the corner trim. Then insert connector clips in line with the left side of panel, Continue installing the clips and cladding in the same fashion. Measure the remaining wall width and cut a panel to fit. |
 |
 |
|
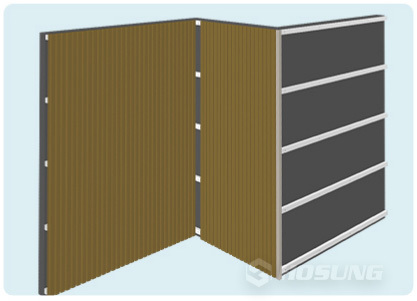
Insert a cladding on the other side of the corner. Continue installing cladding panels with connector clips. Measure the remaining wall width and cut a cladding panel to fit. Then use screws to install the cladding panel onto the joists |
Take L trms and cover both sides at the beginning and the very end. Pre-drill holes in suitable positions, then fix the L trims with screws. |
 |
 |


|
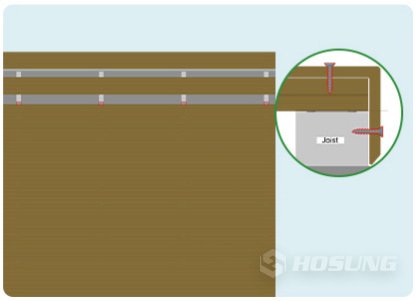
Install joists onto the wall with a 500mm span between adjacent joists. The lower end of the joists should be positioned 5mm above the ground. Then install the starter clips into the joists at a position that is as the same as the lower end of the joists. |
Insert the first cladding panel into the starter clips and insert connector clips in line with the upper side of the wall panel, and screw them onto the joists. |
 |
 |
|
Repeat step 2 to fix more cladding panels. |
After the last cladding panel is installed, put L trims on both sides of the cladding project and fix them to the cladding panels with screws. The installation is finished. |
 |
 |
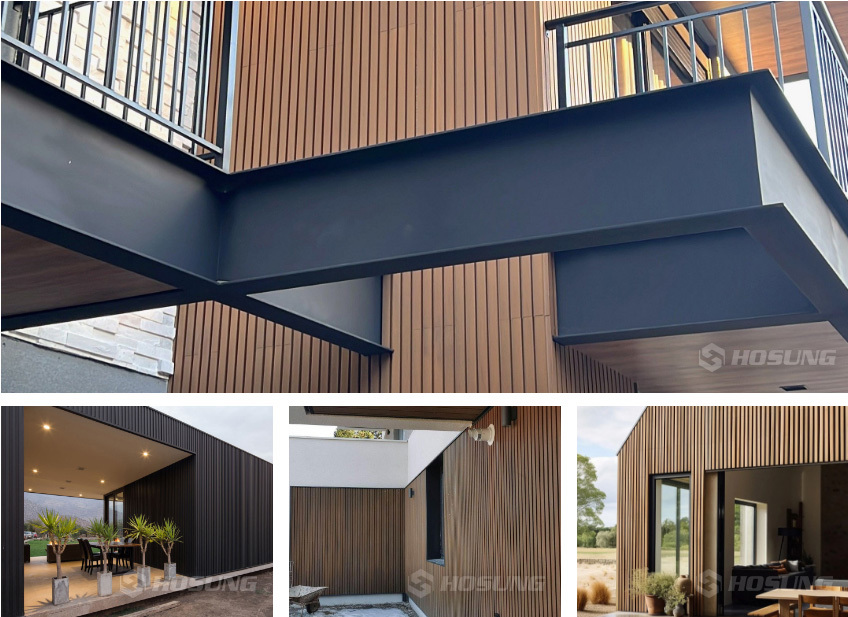
PROJECT SHOW
FACTORY STRENGTH
HOSUNG® is a company which interpreted wpc production,selling, design, and product developing .The company has advanced production technology,leading product development ability, a good reputation,management and technical service

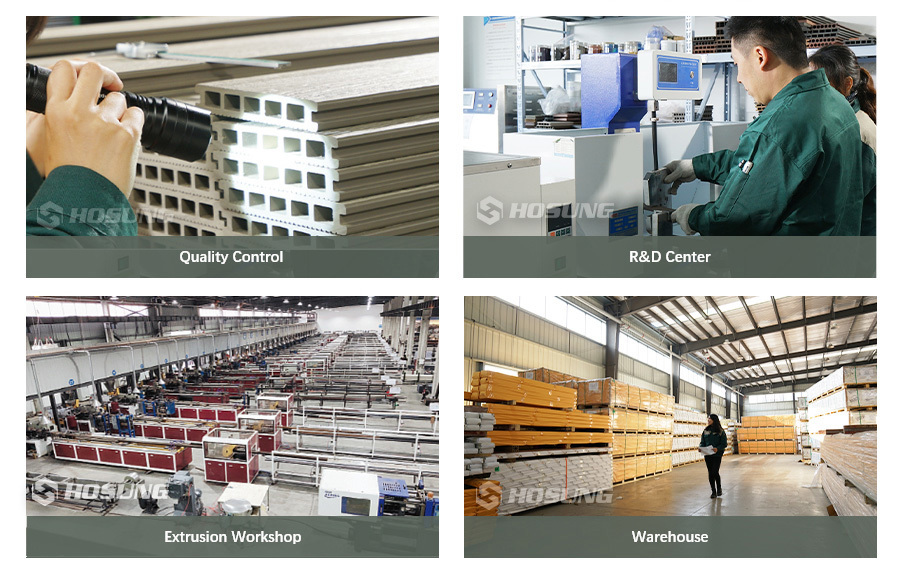
PRODUCTION PROCESS
We sell composite decking, fencing, and wall cladding worldwide; we are committed to selling excellent quality and amazingly priced composite wood products to every client and distributor.
 |
 |
 |
||
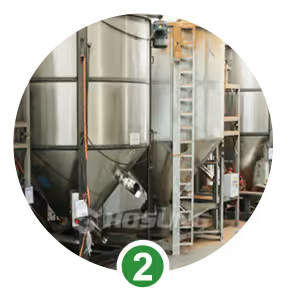
| Get raw materials |  |
Mix all the raw materials | |
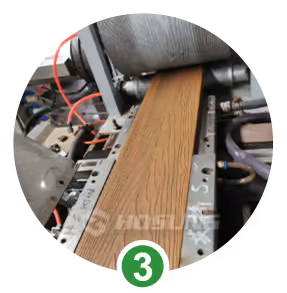
Extruded product |
 |
||||
 |
 |
 |
||
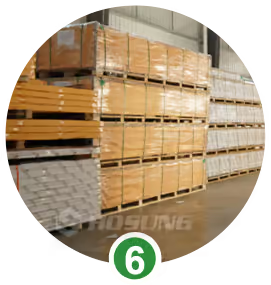
| Store products properly |  |
Fully packaged products | |
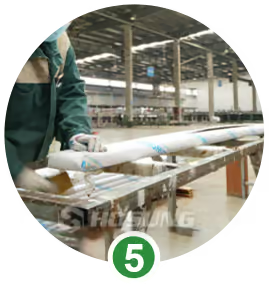
Cutting product carefully |
Hosung®-HS176S13 Beige
The outer polymer coating provides natural wood looking, and highly improved water resistance as well as fade resistance for lasting durability.
Color:
Width*Thickness: 176mm x 13mm
Standard Length: 2.2m, 2.9m, 3.6m
Application: Balcony, Terrace, Veranda, Garden, Swimming pool Coffee shop, etc
Ingredient: 55% wood fiber, 35% HDPE,10% additives
Certificates: FSC, CE, ISO 9001:2019, SGS, IS014001
Consultation
We will contact you within one working day. Please pay attention to your email.
Related Products


ABOUT HOSUNG
RESOURCES